Youth Basketball Screening Basics
Setting Screens
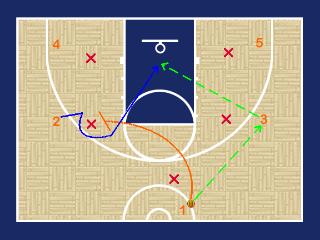
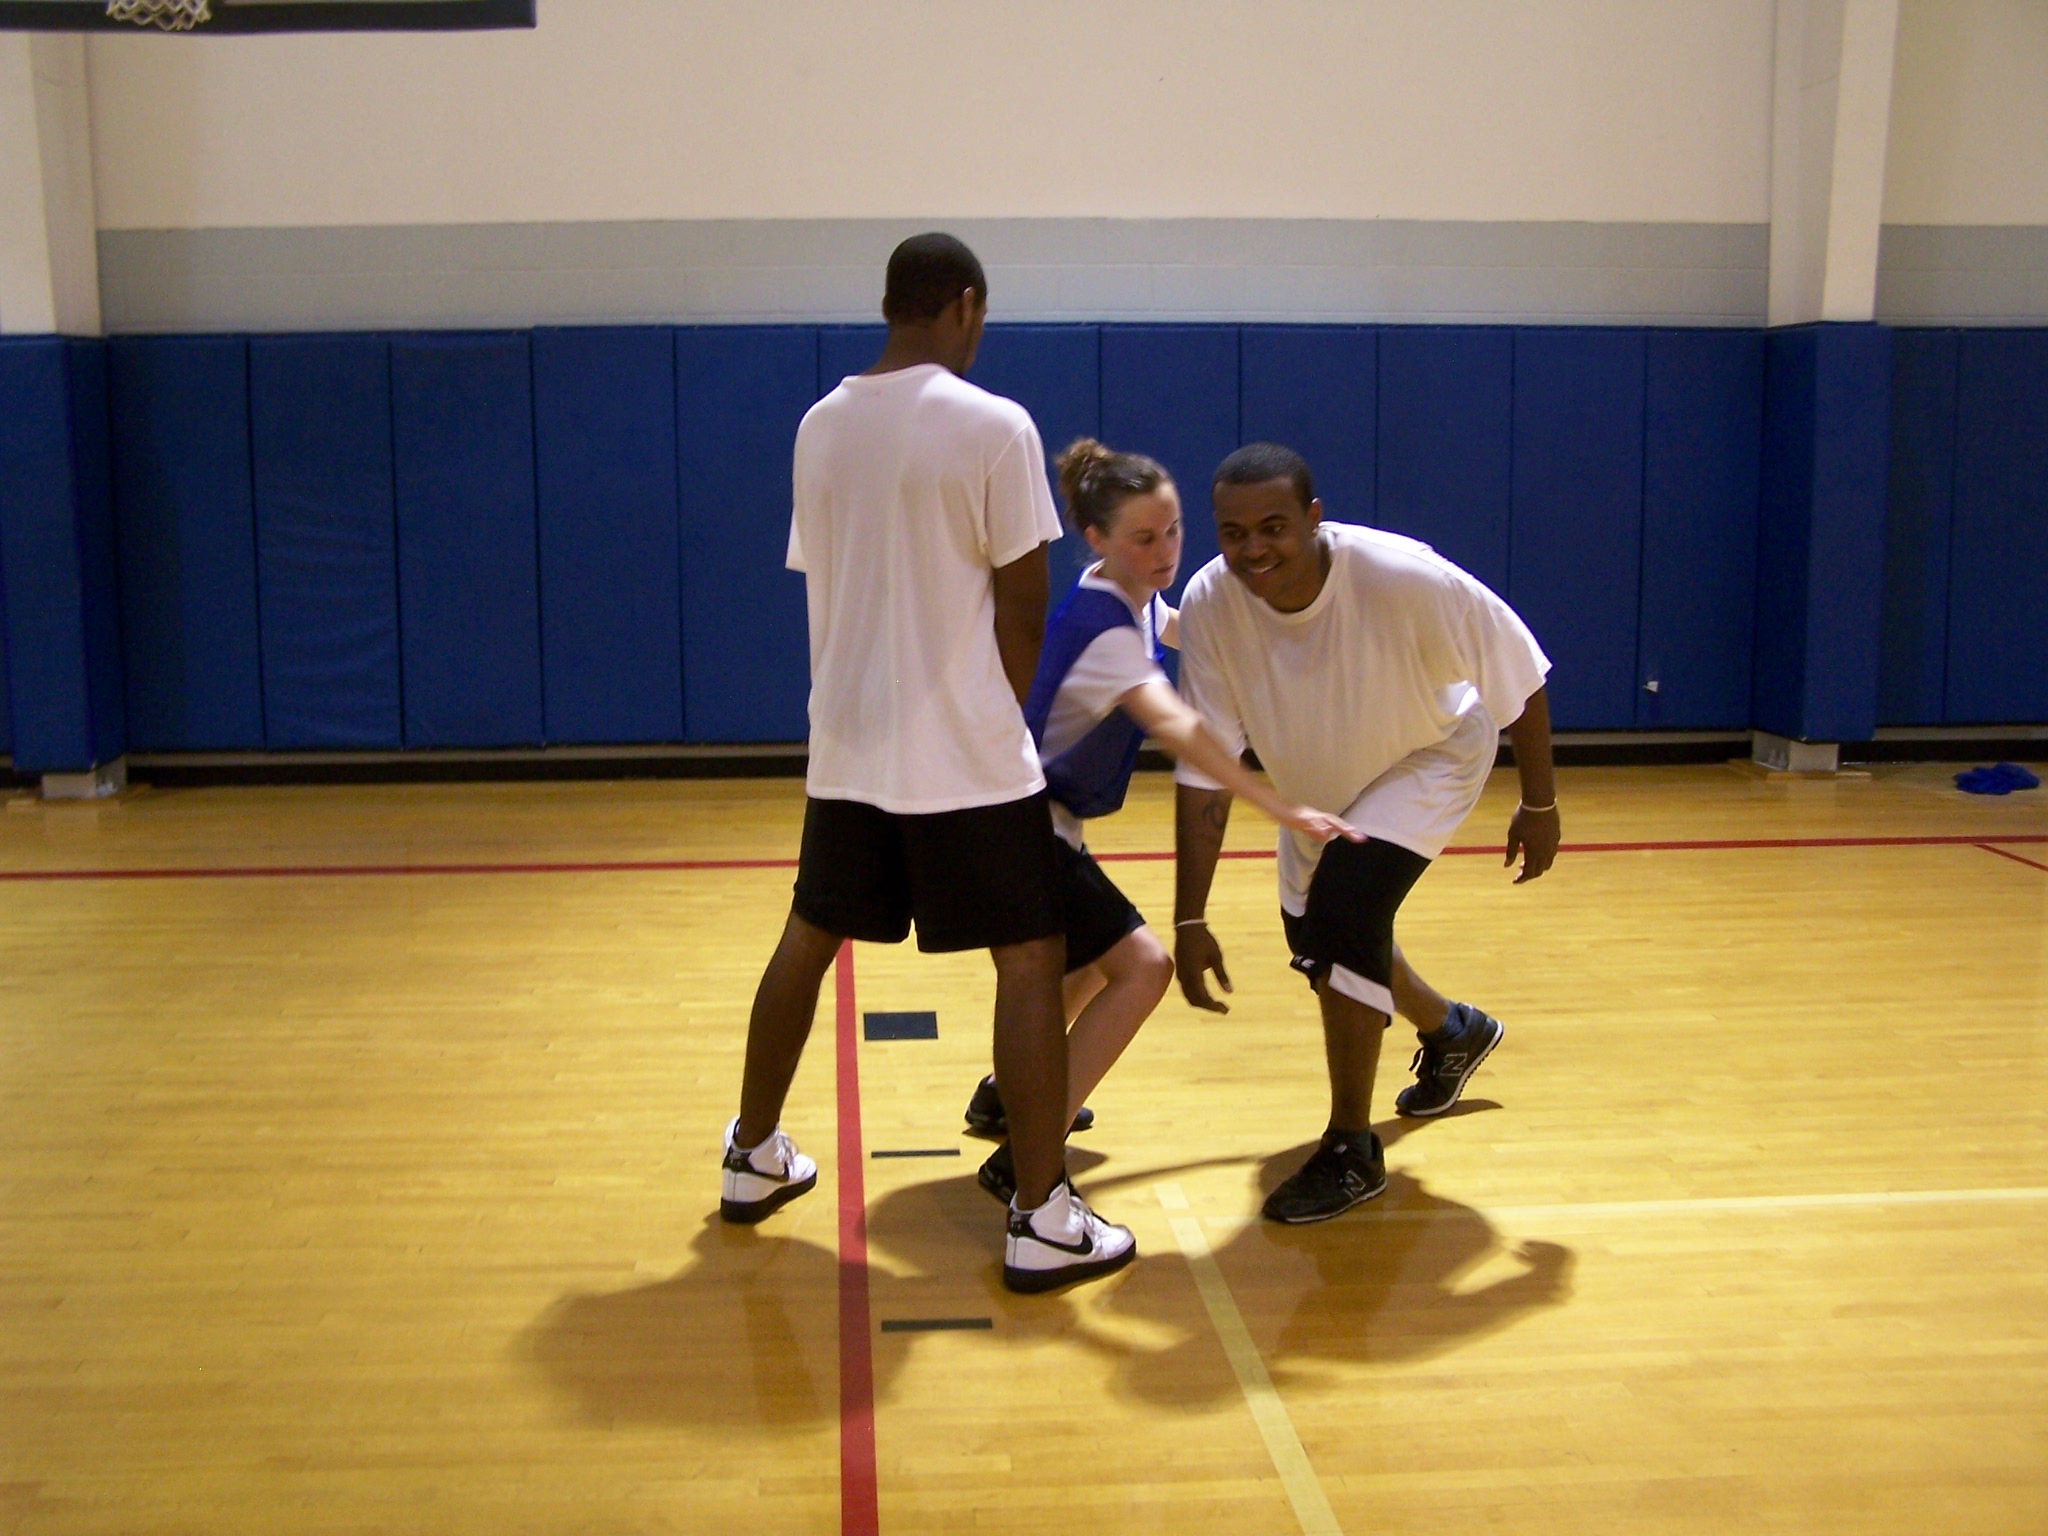
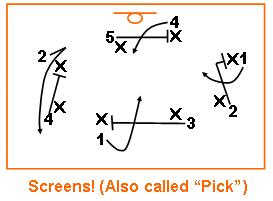
Definition of Basketball Screening: An offensive player that intentionally gets in a position to “block” a defender from guarding another offensive player in order to put the player in a position to be “open.”
 |
 |
 |
The screen is used mainly as the building block for running and executing a Motion Offense, but screens are also used with Zone Offenses, Inbounds Plays, and with Breaking the Press. The term “Setting a Screen” is often used out of context because although one player is actually “setting” the screen, but basketball screening will never work if the player “using” the screen does not execute their part. Both parts of setting a screen have to work in order to set a successful screen, both parts are equally important.
Important Note on Basketball Screening: Setting and Using screens one of the hardest skills to “master” but is certainly a skill that any player (short, tall, fast, slow, good, bad) can learn to do well. It all depends on the player, and attitude. There is no reason that any player on your team cannot learn youth basketball screening basics and execute a proper screen.
What exactly does a screen look like:
Let’s take a look of a video clip of a screen to give you a good idea of what a screen should look like. The video clip example will show a baseline screen.
Screen for the Shooter Example (Left Side)
Note: A good solid screen is one of the hardest things that a defense can “combat” and can create opportunities for high percentage shots for your offense.
Basketball Screening / Setting Screens
(The Basic Steps)
Players must be taught how to “set” a screen and also how to “use” a screen, without both, the screen cannot be successful.
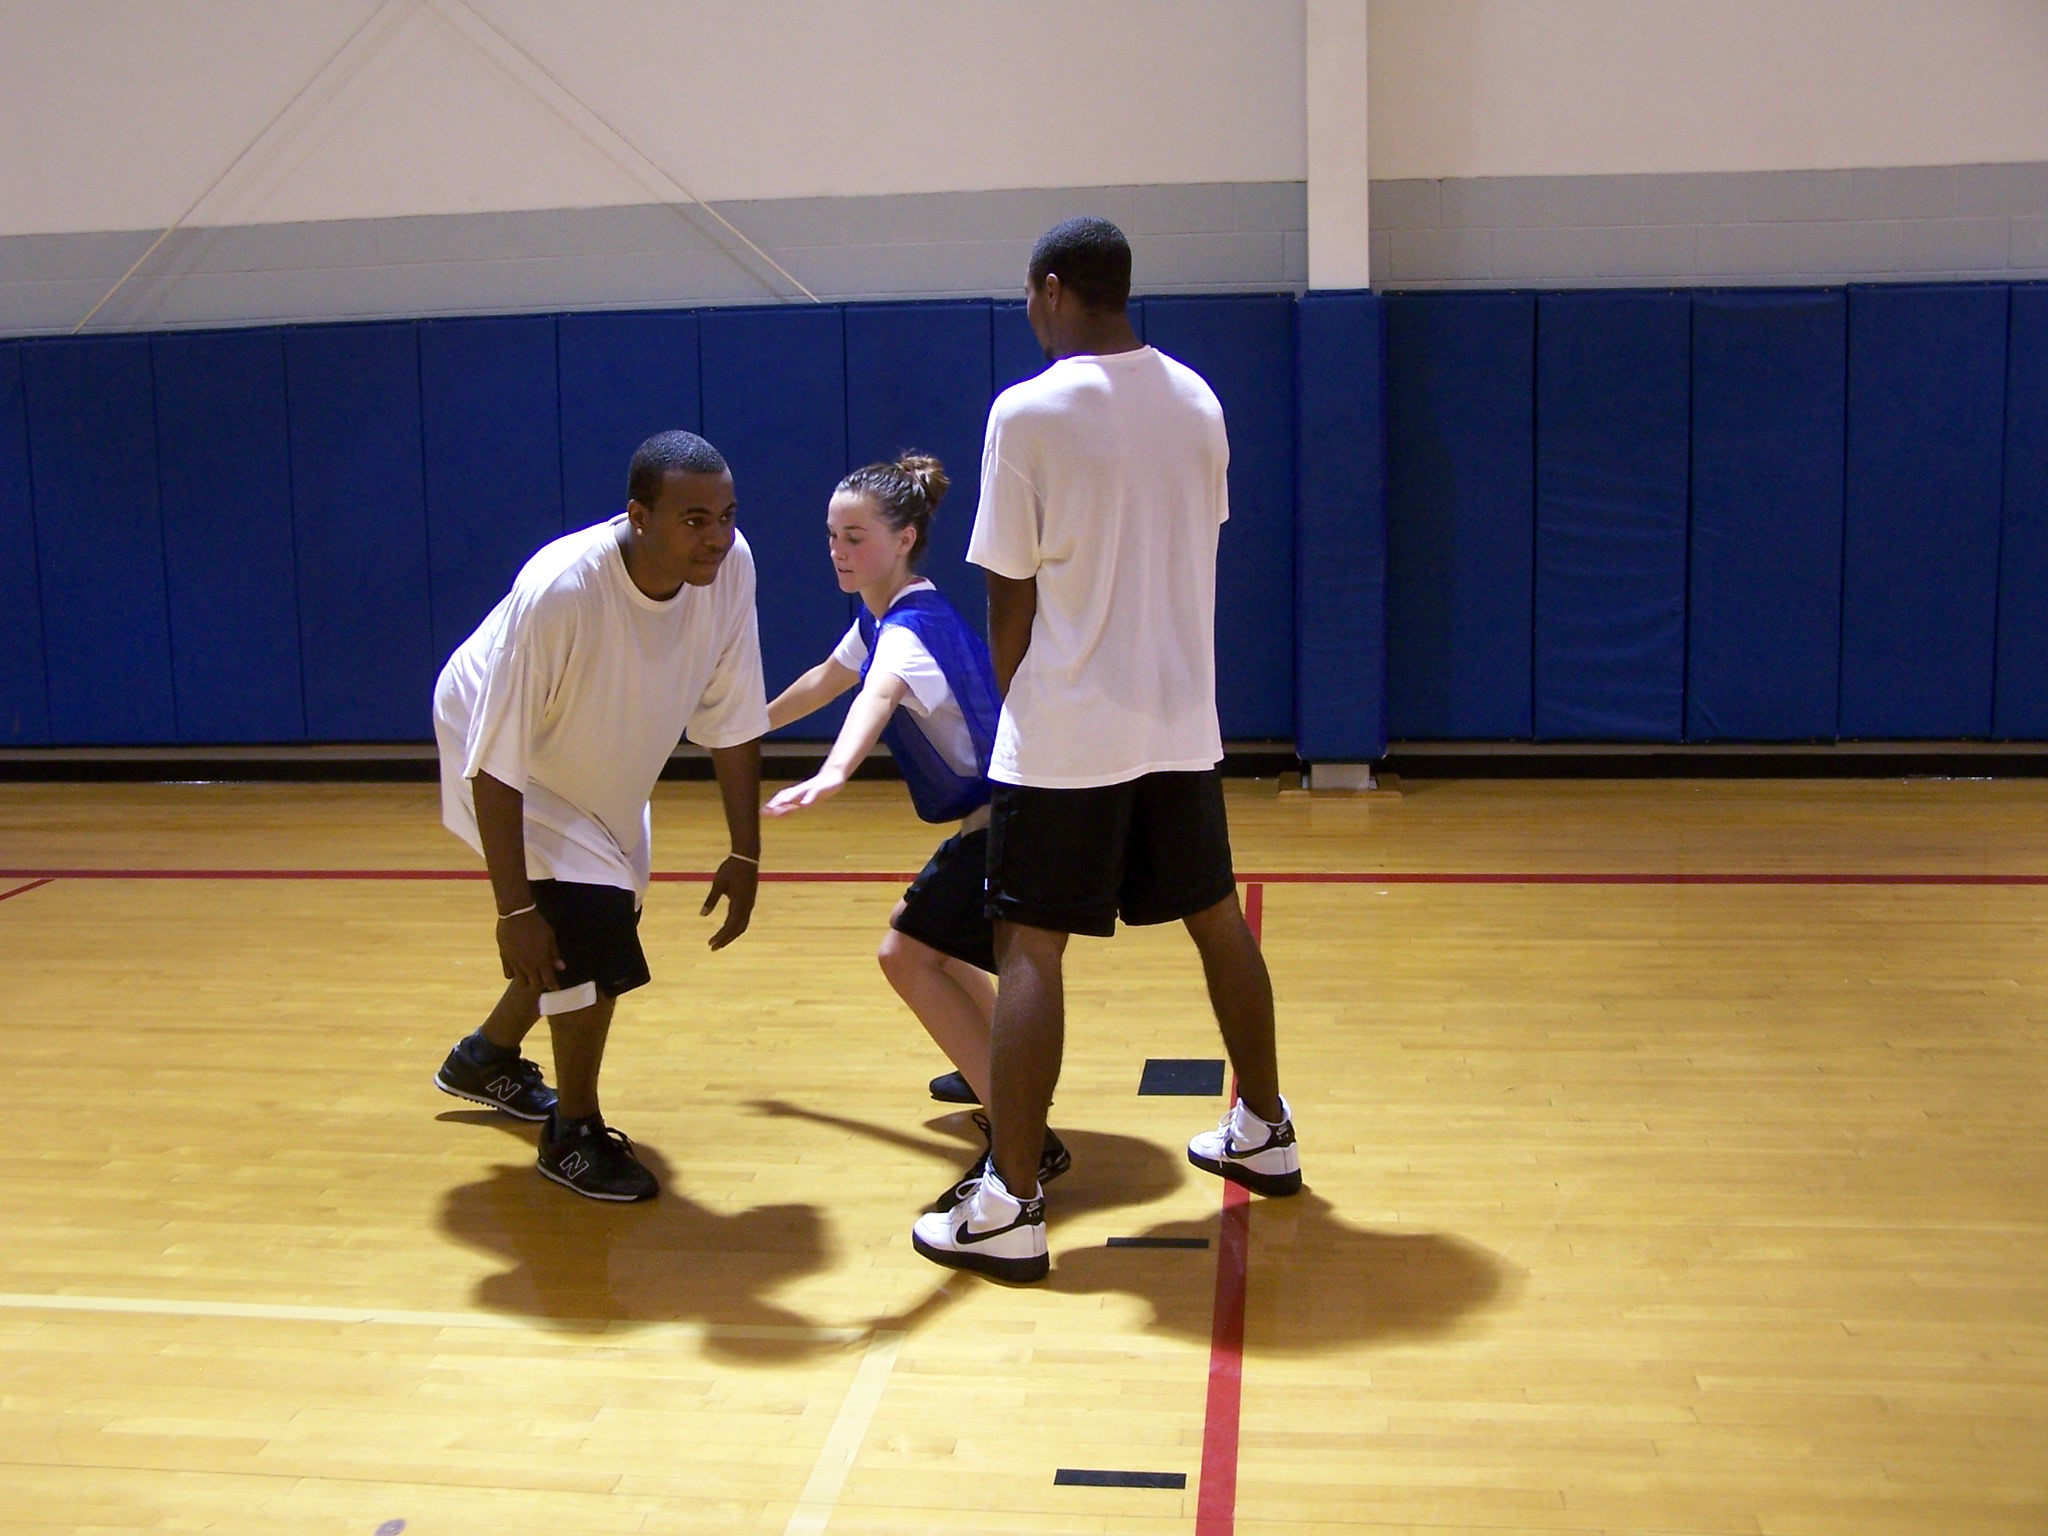
Basic Steps of the “Screener”
a) Signal the player – Call their name, use hand signal to communicate.
b) Use the proper angle (usually the screener will “V” cut to surprise the defender they are screening).
c) Jump stop to a “stationary” position, one full step away from the defender (screener has to be “set” before the user moves).
d) Stay in position, do not move for one full second (wait for the user to rub elbows before moving).
e) “Seal” the defender (which means screen, wait, then turn in such a way that you are blocking the defender).
f) Look for a pass after sealing the defender, get in a position to score. If a screen is set properly, the screener should always be open after the screen.
Basic Steps of the “User”
a) Make eye contact with screener (this lets the screener know you are ready).
b) V-Cut and “turn” the defender away from the screener (this takes the defenders eyes off what is happening).
c) Turn the defender into the screen (the timing is critical).
d) “Rub” off the shoulder / elbow of the screener as you go by them.
e) Cut (quickly) and have your hands ready to receive a pass (always be ready to receive a pass after another player screens your defender, and make the cut quickly).
Screening Principles – Handout
Different Types of Screens:
There are many different types of screens, all have a specific purpose. Here are just a few of the most popular ones used in youth basketball.
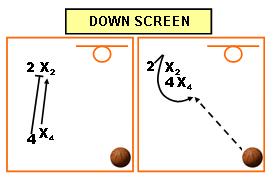
1. The Down Screen – Used when a player screens down and away from the ball – usually screening a player that is near the basket that wants to move up high towards the ball.
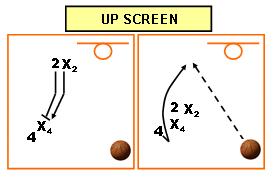
2. The Up Screen – Used when a player screens up towards the ball – usually entails screening a player that is up high that wants to curl low and towards the ball or wants to move down low to a position near the basket as part of a play, etc.
3. Backdoor Screen (Rear Screen – Cutting behind the Screen) – Is the type of “Up” screen that allows the “user” of the screen to confuse the defense by cutting behind the screen. The video clip is the same as the Up Screen example because it shows the “user” of the screen making a back door cut (away from the ball).
4. Low Screen (Baseline Screen) – Any screen that takes place low, around the baseline areas, or even a simple block to block screen.
Baseline Screen Equals Quick Score
5. Ball Screen (Screening the Player with the Ball) – This is the type of screen that can either be part of a play, or is used simply to get a defender off your ball handler. The video clip example shows a pick and roll play with Player 2 setting a screen for Player 1 (who is dribbling the ball).
Pick and Roll Elbow to Wing (Left Side)
6. Screen Away from the Ball – This is more of a basketball screening “term” that relates to a basic screen that is usually part of a motion play or is used as part of a quick hitter play where players pass the ball to the wing area and “screen away” from the ball.
The Different Types of Cuts used with Screens:
There are different types of cuts used with screening and all have a specific purpose. It is very important to teach your players the importance of “cutting” and how critical it is to the execution of the screen.
1. The Curl Cut – Is best used when a defender is following the offensive player. Curl around the screener with your hands ready to receive a pass.
2. Screen / Flash to the Ball – Quickness is the best way to get open to receive a pass, there’s nothing worse than a player setting a good screen and then moving slowly to the ball (once a screen is set, and the player uses the screen, flash quickly to the ball – it is important to know that this is an option in the offense).
3. Backdoor Cut (Fist) – This type of cut is used when the defender is cheating a little. The cutter fakes like they are using the screen, but then “back cuts” to the basket. The video clip demonstrates an Up Screen, and a Back Door cut…
4. The “V” Cut – The most basic, and most taught “cut” used in youth basketball. The “V” cut works best if the player goes into the cut at medium speed, then out of the cut at a fast speed (In Medium, Out Fast).
Types of Offenses that use Screens:
There are different types of offenses that utilize screens, all have a specific purpose. When teaching the younger players try to keep it simple until they are comfortable, then move on… Since this information is covered in more detail in other sections on this site, I will only cover each briefly here:
1. Motion Offense – Used mainly vs. a man to man defense, but sometimes a coach will call motion offense just to get their players moving vs. a zone defense.
2. Zone Offense – Yes, screens do work vs. zone defenses, but you have to use wisely. Use screens vs. a zone defense when you need to get your shooter open. Or simply use screens to “bother” the defense. If the offense is setting screens vs. a zone defense it can bother a defense. This causes the defense to have to work harder to get to there area of coverage. And better yet the defense will start taking their eyes off the ball and start looking for the screens. Try it!
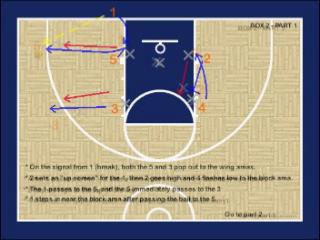
3. Inbound Plays: Do Inbounds Plays Use Screens? – Yes, Screens are very effective vs. zone or man to man defenses when it comes to inbounds plays. The example will show an inbounds play setting screens vs. a zone defense. The general rule is that when inbounding the ball, the other team will always run a zone defense to protect the basket, but if they don’t, make sure to use an inbounds play that will make the other team pay for their mistake (in the form of an easy basket for your team).
4. Press Breaking – When the other team runs a full court press and they are totally denying the inbounds pass – you have to set a screen (or two) to get your ball handler open.
5. Pick and Roll Plays – The screen is used in many offenses, but one of the most popular is the “Pick and Roll” plays. The pick and roll is not used much at the younger ages, but all players should be exposed to this very effective offensive play and skill. I won’t go into much detail here, but I will show examples of some very popular pick and roll plays used vs. man to man defense.
Sealing the Defender after a Screen:
One of the most effective screening skills that a player can learn is “sealing a defender.”
Right after a screen is set properly the “Seal” will be available . If the offensive player sets the screen, then turns their body in such a way that they are now “blocking” or “sealing” off a defender – this puts the offensive player in a great position to receive a pass (and a scoring opportunity).
Sealing a Defender After a Screen (refer to diagram).
1. A player “4” just set a screen, both feet are planted on the court.
2. In this example 4 will use their right foot as the pivot foot.
3. The 4 will take their left foot and swing around (back pivot) to a position that seals off the defender.
4. The 4 is now in a better position to receive the ball (scoring opportunity), or in a very good position for an offensive rebound.
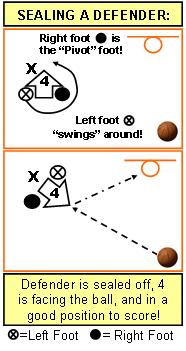
Sealing a Defender (After the Screen)
Developing Screening Skills:
The best way to develop screening skills is to “Drill” it into the players (over and over, and over and over again). It will take a long time for the players to develop and understand the principles of screening – coaches need to have patience and persistence. Here is a drill that can certainly assist coaches with practicing basketball screening. This drill basically shows an “Up” screen drill, and a “Down” screen drill.
Screening Drills (Up Screens / Down Screens)
Why screens don’t work:
There are many reasons why a screen will not work – here are a few of those reasons:
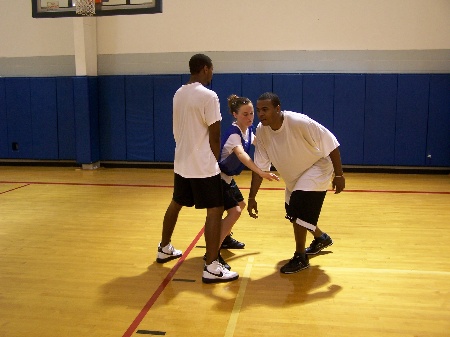
1. The player setting the screen did not take the proper angle (and the defender can see them coming).
2. The player setting the screen jumped into the defender. Called a “moving” screen.”
3. The player using the screen did not use the screen properly – they did not turn their defender.
4. The player using the screen left too early. Basically before the screener even got there.
5. Another big problem with setting and using screens is timing. Just one of the two players needs to be off a little (1/2 second is all it takes) for basketball screening to be unsuccessful.
6. Lack of communication between screener and user.
7. Coaches put the wrong players on the court! Above all coaches must find the 5 players that work together the best when it comes to setting screens. This could mean that you may have to change out your regular starting 5 with players that will execute screens properly.
8. Laziness / sloppiness on the part of one or both players.
Conclusion
Basketball Screening – Even though any player can learn to Set and Use a screen, keep in mind that Setting and using screens is one of the hardest basketball skills for the younger players to execute properly. It’s mostly because of the mental part of the game (lack of focus, discipline, concentration, lack of knowledge), and it is a very hard skill to remember to do properly in the game (just like boxing out is). It will take time, be patient, eventually it will all come together…
